
Saturday, December 31, 2011
Happy New Year
Happy 2012! I thought I'd take a minute to pop in and wish all my followers and other readers a Happy New Year. I'm hoping for great things personally and for my blog in the coming year -- like doubling my followers, ha ha ha!

Thursday, December 29, 2011
The last of our 2011 elf adventures
A quick post to share the last of our elf adventures this year:
The elves pulled out all the Beyblades and had fun one night.


Thursday, December 22, 2011
Who needs a bed?
We're lucky that we have big walk-in closets in each of the bedrooms. Sometimes this space lends itself to a bit of creativity. Each of the kids shares a room with one of their siblings, so sometimes they want their own space. How to accomplish this? Move into the closet, of course!

Thursday, December 15, 2011
Sock Monkey ornament tutorial
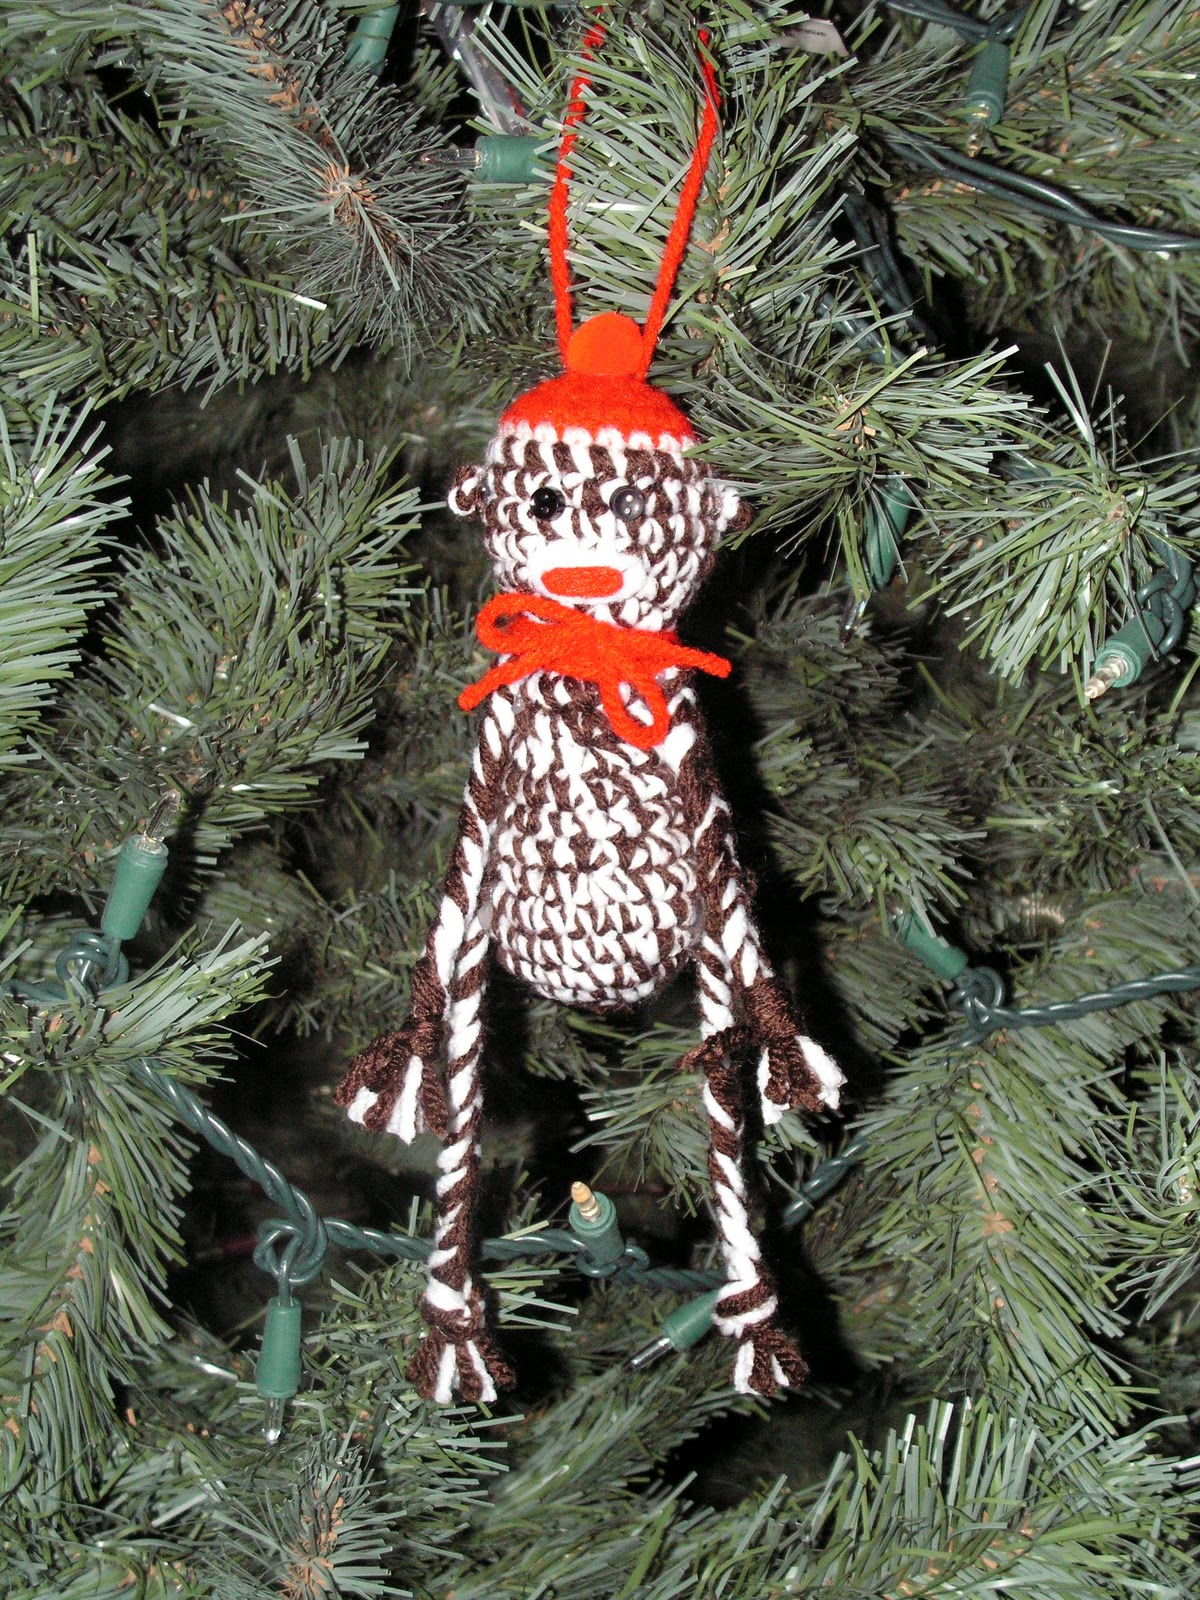
Today I'm sharing a tutorial for the amigurumi-style sock monkey ornament I invented for the ornament exchanges I participated in this year.
 Crochet Sock Monkey Ornament
Materials needed:
red yarn
brown yarn
white or cream yarn
I-9 (5.50 mm) crochet hook
yarn needle
Fiberfill
red pompom for hat
felt or tiny buttons for eyes
white and red felt for mouth - cut into narrow, elongated ovals with the white a bit larger than the red
Note: I have a fairly tight crochet, so you may want a smaller or larger hook to create your desired size monkey.
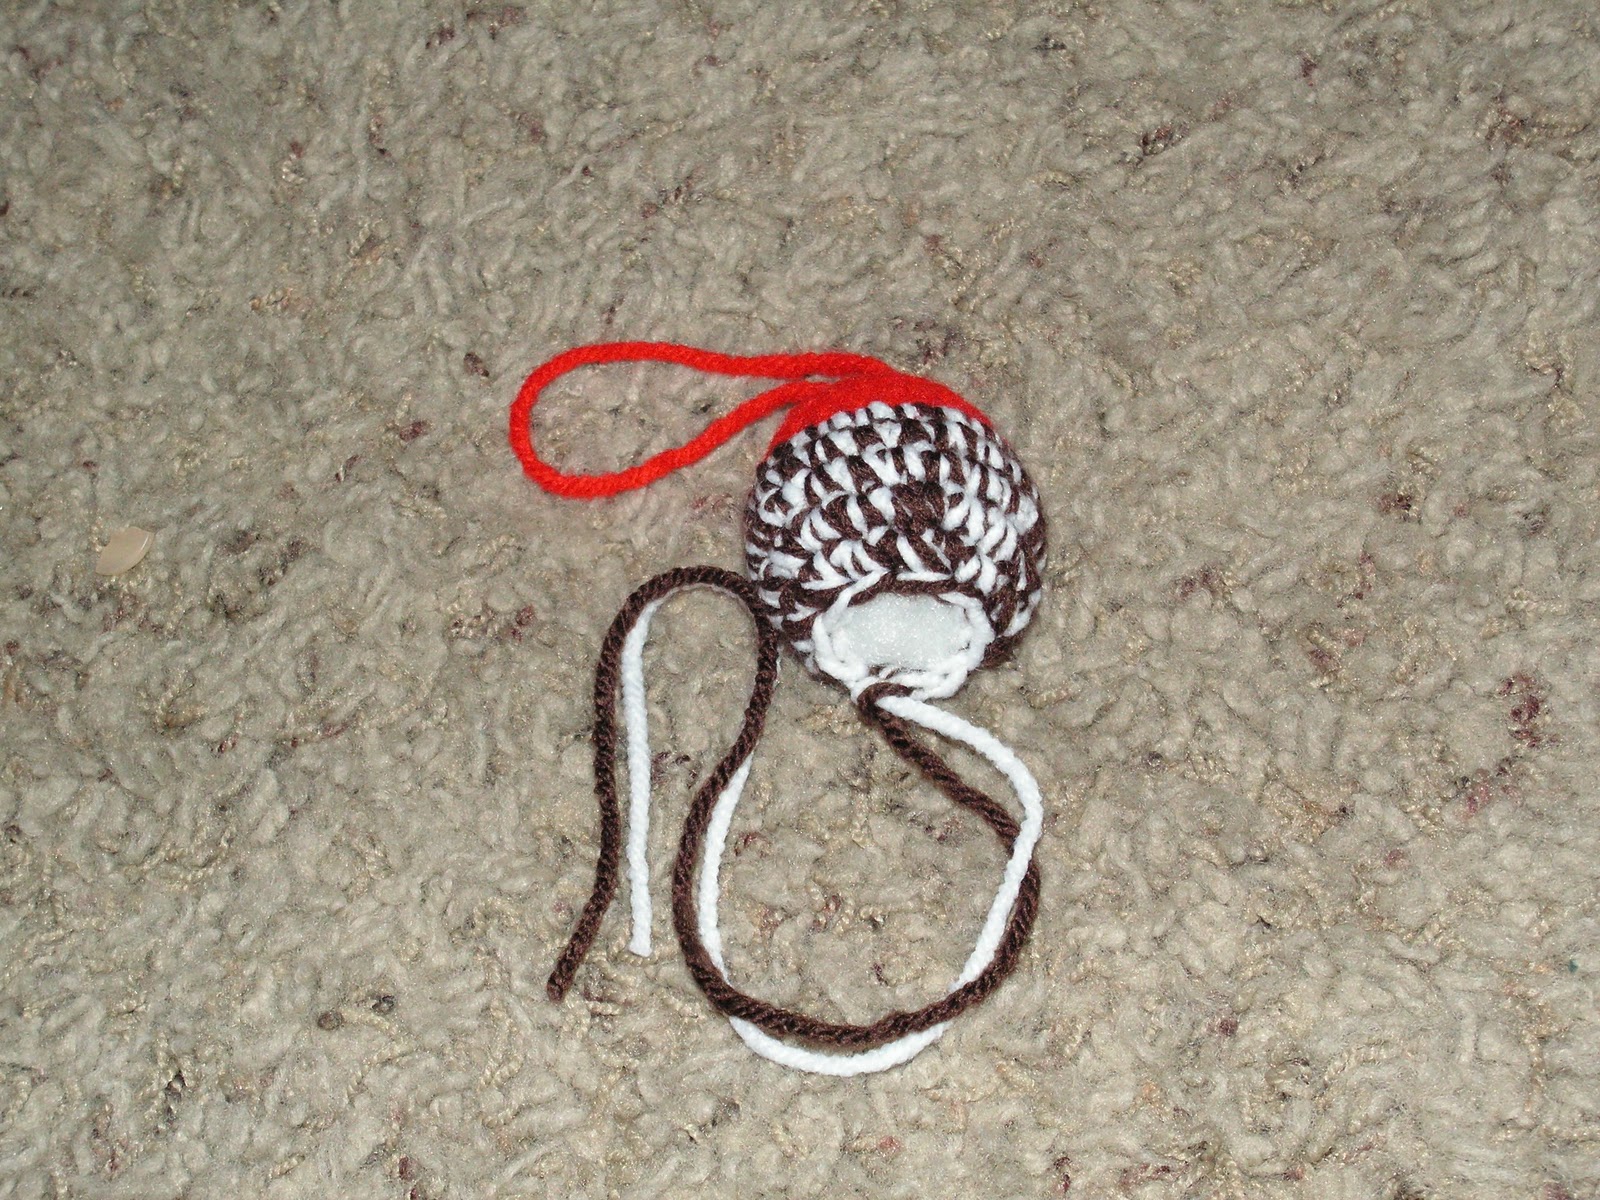
 For head:
(Work in rounds, use stitch marker at end of each round)
With red, ch 2 (or make magic ring)
Rnd 1: 5 sc in 2nd chain from hook (or in magic ring)
Rnd 2: 2 sc in each st, around (10 sc)
Rnd 3: *sc in next st, 2 sc in next st* repeat from * around (15 sc)
Rnd 4: *sc in next 2 st, 2 sc in next st* repeat from * around (20 sc)
If you want a contrasting band around hat, switch to white or cream for round 5.
Rnd 5: sc in each stitch, around (20 sc)
Remainder of head and body is worked using one strand of brown and one strand of white/cream held together.
Rnd 6-9: sc in each stitch, around (20 sc)
Rnd 10: *sc2tog, sc in next 2 stitches* repeat from * around (15 sc)
Rnd 11: *sc2tog, sc in next st* repeat from * around (10 sc)
Finish off with a long tail to attach head to body.
Before stuffing, use needle to run length of red yarn through top of head to provide hanger. Tie with a square knot and trim ends.
Stuff with fiberfill.
 For body:
(Body is worked in rounds holding 1 strand of brown and 1 strand of white together.)
Ch 2 (or magic ring)
Rnd 1: 5 sc in 2nd ch from hook (or in magic ring)
Rnd 2: 2 sc in each st, around (10 sc)
Rnd 3: *sc in next st, 2 sc in next st* repeat from * around (15 sc)
Rnd 4: *sc in next 2 st, 2 sc in next st* repeat from * around (20 sc)
Rnd 5-6: sc in each st, around (20 sc)
Rnd 7: *sc2tog, sc in next 2 st* repeat from * around (15 sc)
Rnd 8-10: sc in each st, around (15 sc)
Rnd 11: *sc2tog, sc in next st* repeat from * around (10 sc)
Rnd 12-13: sc in each st, around (10 sc)
Stuff with fiberfill.
Rnd 14: sc2tog, around to close opening.
Finish off. Tuck tail into body.
Arms & legs:
For each limb, cut 12 8-inch lengths of yarn.
 Tie one end in a snug overhand knot.
 Divide strands into three groups. Braid together until braid measures about 3 inches for legs and 2 1/2 inches for arms.
 Secure braided section by wrapping with yarn several times. Tie off with a square knot on the back. Trim ends evenly.
(Note: You could crochet limbs, I would start with white or cream yarn and try about 3 sc in the beginning, then 2 sc in each stitch to get 6 sc per round. Crochet several rounds, then switch to the two colors held together for the remaining rounds. I try not to work with those narrow rounds any more than absolutely necessary.)
For ears:
 Leaving a short tail, tie 3 overhand knots atop one another. Trim ends close.
Assembly:
 Using tail on head, sew to body. (If needle can't hold both strands or if it is too difficult to pull both strands through, use just one strand to attach head. Cut the other strand shorter and tuck into head before attaching.)
To make monkey's tail, run an 8-inch length of brown yarn through body at desired location. Tie an overhand knot to secure ends together. Trim ends. If desired, add additional knots to tail length. (I did one in the middle.)
Using hot glue, attach pompom to top of head. Glue red felt oval to white felt oval for mouth. Glue to front of head near neck join. Glue buttons (or small felt dots) between mouth and edge of hat for eyes. Glue ear clusters to side of head (about the same level as eyes), being careful to tuck raw ends under as much as possible.

Glue arms and legs in desired locations.
Tie a length of red yarn around neck joint and secure in a bow.
Hang your completed monkey on your tree and enjoy!
 Or, cut a square of sock monkey fabric. Roll ornament up and tie ends to create a fun little package to send off to your ornament recipient.


Materials needed:
red yarn
brown yarn
white or cream yarn
I-9 (5.50 mm) crochet hook
yarn needle
Fiberfill
red pompom for hat
felt or tiny buttons for eyes
white and red felt for mouth - cut into narrow, elongated ovals with the white a bit larger than the red
Note: I have a fairly tight crochet, so you may want a smaller or larger hook to create your desired size monkey.
(Work in rounds, use stitch marker at end of each round)
With red, ch 2 (or make magic ring)
Rnd 1: 5 sc in 2nd chain from hook (or in magic ring)
Rnd 2: 2 sc in each st, around (10 sc)
Rnd 3: *sc in next st, 2 sc in next st* repeat from * around (15 sc)
Rnd 4: *sc in next 2 st, 2 sc in next st* repeat from * around (20 sc)
If you want a contrasting band around hat, switch to white or cream for round 5.
Rnd 5: sc in each stitch, around (20 sc)
Remainder of head and body is worked using one strand of brown and one strand of white/cream held together.
Rnd 6-9: sc in each stitch, around (20 sc)
Rnd 10: *sc2tog, sc in next 2 stitches* repeat from * around (15 sc)
Rnd 11: *sc2tog, sc in next st* repeat from * around (10 sc)
Finish off with a long tail to attach head to body.
Before stuffing, use needle to run length of red yarn through top of head to provide hanger. Tie with a square knot and trim ends.
Stuff with fiberfill.

(Body is worked in rounds holding 1 strand of brown and 1 strand of white together.)
Ch 2 (or magic ring)
Rnd 1: 5 sc in 2nd ch from hook (or in magic ring)
Rnd 2: 2 sc in each st, around (10 sc)
Rnd 3: *sc in next st, 2 sc in next st* repeat from * around (15 sc)
Rnd 4: *sc in next 2 st, 2 sc in next st* repeat from * around (20 sc)
Rnd 5-6: sc in each st, around (20 sc)
Rnd 7: *sc2tog, sc in next 2 st* repeat from * around (15 sc)
Rnd 8-10: sc in each st, around (15 sc)
Rnd 11: *sc2tog, sc in next st* repeat from * around (10 sc)
Rnd 12-13: sc in each st, around (10 sc)
Stuff with fiberfill.
Rnd 14: sc2tog, around to close opening.
Finish off. Tuck tail into body.
Arms & legs:
For each limb, cut 12 8-inch lengths of yarn.


(Note: You could crochet limbs, I would start with white or cream yarn and try about 3 sc in the beginning, then 2 sc in each stitch to get 6 sc per round. Crochet several rounds, then switch to the two colors held together for the remaining rounds. I try not to work with those narrow rounds any more than absolutely necessary.)
For ears:

Assembly:

To make monkey's tail, run an 8-inch length of brown yarn through body at desired location. Tie an overhand knot to secure ends together. Trim ends. If desired, add additional knots to tail length. (I did one in the middle.)
Using hot glue, attach pompom to top of head. Glue red felt oval to white felt oval for mouth. Glue to front of head near neck join. Glue buttons (or small felt dots) between mouth and edge of hat for eyes. Glue ear clusters to side of head (about the same level as eyes), being careful to tuck raw ends under as much as possible.

Glue arms and legs in desired locations.
Tie a length of red yarn around neck joint and secure in a bow.
Hang your completed monkey on your tree and enjoy!


Linking up:
Tuesday, December 13, 2011
10 Elf Adventures
Do you have a Christmas Elf that visits your family? Want to know more about the Christmas Elf tradition? Go here to see a previous post I wrote about our elves.
I wanted to share some of our elf adventures from the past couple of years.
One morning we found Ashley, Kyle and Kayla hanging out in the freezer. It looks like their midnight snack was ice cream.

Kyle and Ashley showed up in the kids' desks at school.

Kayla tried to hitch a ride to school.

The elves tried their hand at crocheting, and ended up with a big yarn mess instead.

Hanging out with Cowie and Reindeer on the tree

A marshmallow snowball fight

Game night with game-themed candy

Decorate the kitchen with candy canes on all the cupboard handles

Read the Christmas books

Raid the pantry and spell out Ho Ho Ho

Movie night complete with popcorn and goodie plates

Linking up:

Happy Santa Lucia Day
Today (December 13) is Santa Lucia Day in Sweden. Since hubby lived in Sweden for two years while serving a church mission, we try to do something to recognize the day. A few days ago I read a great post about Santa Lucia here.
The holiday honors St. Lucia as she brings light and treats in the dark.
The traditional costume is a white dress and red sash and a crown or wreath with candles. Traditionally the oldest daughter awakens her family by serving them breakfast in bed including saffron buns and/or cookies like gingersnaps. She also sings the "Santa Lucia" song.

In Sweden the children have a parade led by the girl chosen to play Lucia. Other children are dressed in white like Lucia or as "star boys". Everyone carries candles.
Over the years we've enjoyed having a Christmas tradition that is a bit unique. One year The Artist even dressed a doll like Santa Lucia for a school project.
The holiday honors St. Lucia as she brings light and treats in the dark.
The traditional costume is a white dress and red sash and a crown or wreath with candles.
 Traditionally the oldest daughter awakens her family by serving them breakfast in bed including saffron buns and/or cookies like gingersnaps. She also sings the "Santa Lucia" song.
In Sweden the children have a parade led by the girl chosen to play Lucia. Other children are dressed in white like Lucia or as "star boys". Everyone carries candles.
Over the years we've enjoyed having a Christmas tradition that is a bit unique. One year The Artist even dressed a doll like Santa Lucia for a school project.
Monday, December 12, 2011
Handmade Ornament Exchange
I recently participated in a handmade ornament swap. I had a plan for the ornament I was going to make and had supplies, then I received an adorable package in the mail from Wendy of Wendy Mac Designs. These goodies were inside:

 Aren't they adorable? She had them all wrapped up with a cute ribbon and brooch holding everything together.
Enter my inadequacy syndrome.
How was I supposed to come up with something as cute as this? Suddenly my plan for the ornaments I was going to make looked very childish in comparison. I only had a few days left for the deadline and I was back to square one. I racked my brain for an idea that would be even half as cute as what Wendy sent. I decided to fall back on my amigurumi skills and the general obsession around here with sock monkeys, and I invented a little crocheted sock monkey ornament.
 What do you think?
 Any interest in a tutorial? Go here for the tutorial.
I also sent one of these cuties off to a different ornament exchange. Unfortunately, I haven't received anything in return yet.


Enter my inadequacy syndrome.
How was I supposed to come up with something as cute as this? Suddenly my plan for the ornaments I was going to make looked very childish in comparison. I only had a few days left for the deadline and I was back to square one. I racked my brain for an idea that would be even half as cute as what Wendy sent. I decided to fall back on my amigurumi skills and the general obsession around here with sock monkeys, and I invented a little crocheted sock monkey ornament.

I also sent one of these cuties off to a different ornament exchange. Unfortunately, I haven't received anything in return yet.
Monday, December 5, 2011
Crochet Bobble Bag
The other day I shared a sneak peek of my bobble bag. This was made from a pattern printed on a skein wrapper. However, unlike Red Heart brand, I can't find a link to this pattern. I don't think I'm infringing on any copyrights to share it. This is NOT an original design by me, it is from Hobby Lobby's "I Love This Yarn".
The bobbles create an interlocking diamond pattern.

Bobble Bag
Skill Level: Easy
Finished size: 15" x 15" without strap
Materials:
4 skeins worsted weight yarn (roughly 12 ounces of each color if using two colors)
(I used "I Love This Yarn" in Greybeard and Elements.)
size I-9 (5.5 mm) crochet hook
Tapestry needle
Gauge: 10 sts and 11 rows = 4" in pattern
Double crochet 3 stitches together (dc3tog): (Yo, insert hook in st and pull up loop, yo, pull through 2 loops on hook) 3 times, yo, pull through all 4 loops on hook.
Notes: Use 2 strands of yarn held together for pattern.
Sc row is RS of piece. Push dc3tog bobbles to back as formed.
INSTRUCTIONS
(Make 2 bag sections.)
With 2 strands held together, ch 38, turn.
Row 1-3: Ch 1, sc in each st across, turn - 37 sts.
Row 4: Ch 1, 2 sc, *dc3tog, sc, rep from * across, ending sc in last st, turn - 17 dc3tog.
Row 5 and all odd rows: Ch 1, sc in each st across, turn.
Row 6: Ch 1, 3 sc, *dc3tog, sc, rep from * across, ending 2 sc - 16 dc3tog.
Row 8: Ch 1, 2 sc, (dc3tog, sc) 2 times, *2sc, (dc3tog, sc), rep from * ending 2 sc, (dc3tog, sc) 2 times, sc - 13 dc3tog.
Row 10: Ch 1, 3 sc, *dc3tog, 5 sc, dc3tog, sc, rep from * ending 2 sc - 8 dc3tog.
Row 12: Ch 1, 2 sc, *dc3tog, 7 sc, rep from * across ending dc3tog, 2 sc - 5 dc3tog.
Row 14: Ch 1, 6 sc, *dc3tog, 7 sc, rep from * across ending dc3tog, 6 sc - 4 dc3tog.
Row 16: Ch 1, 5 sc, *dc3tog, sc, dc3tog, 5 sc, rep from * across - 8 dc3tog.
Row 18: Ch 1, 2 sc, *2sc, (dc3tog, sc) 3 times, rep from * ending 3 sc - 12 dc3tog.
Row 20: Ch 1, 3 sc, *dc3tog, sc, rep from * across ending 2 sc - 16 dc3tog.
Row 22: Ch 1, 2 sc, *dc3tog, sc, rep from * across ending sc in last st - 17 dc3tog.
Row 24: Rep Row 20.
Row 26: Rep Row 18.
Row 28: Rep Row 16.
Row 30: Rep Row 14.
Row 32: Rep Row 12.
Row 34: Rep Row 10.
Row 36: Rep Row 8.
Row 38: Rep Row 6.
Row 40: Rep Row 4.
Row 42: Rep Row 1.
Finishing:
With RS together, sew sides and bottom seams together.
Strap
With 2 strands held together, ch 6, turn.
Row 1: Sc in 2nd ch from hook and in each ch across, turn - 5 sts.
Row 2: Ch 1, sc in each sc across, turn.
Rep Row 2 until strap measurres 64" or desired length.
Fold strap in half and sew ends to top sides of bag. With 1 strand of yarn, sc straps together along both sides - single 32" strap.
Abbreviations: ch = chain, dc3tog = double crochet 3 together, rep = repeat, RS = right side, sc = single crochet, st(s) = stitch(es), yo = yarn over
- I haven't completely decided if the variegated yarn takes away from the bobble design or if it works. The original pattern uses 4 skeins of the same, solid colored yarn.
- The suggested handle size works for a cross-body strap or a long shoulder strap.
- If you want a boxier bag, you could extend the size of the handle, sew it into a loop and then sew the front and back bag sections to the handle along the sides and bottom.
- I added a row of single strand single crochet along the top edge of each bag section.
Please let me know if you find any problems with the pattern as these are probably due to typing errors on my part. :) Leave me a comment if you decide to make one, I'd love to see it.
Linking up:
Sunday, December 4, 2011
Our elves arrived
We woke up Saturday morning to a surprising sight:
 Our elves, Kayla, Kyle and Ashley, came back for another visit. They brought their trusty sidekicks, Cowie and Reindeer. This will be the third year we've had this fun tradition.
This morning we woke up to this in the family room:
 Apparently time spent crocheting didn't go unnoticed. Poor Kyle got the worst of it, he appeared to have skein duty but it was a bit too much for him.
 Kayla and Ashley didn't seem to know what to do with the crochet hooks, but they sure made a mess of the yarn anyway.
 Who knows what we'll find when we wake up tomorrow?

This morning we woke up to this in the family room:


Friday, December 2, 2011
It's Christmastime
December is finally here. Now I can jump completely into Christmas festivities without feeling the slightest bit guilty about overshadowing other holidays. I will admit that our tree has been up since before Thanksgiving. I always thought I was the one to get excited about Christmas. I lost the battle of when to put the tree up. Apparently a week BEFORE Thanksgiving is now the proper time. Oh well. With the tree up, I was able to put some new goodies on it.
 Aren't these Wonder Forest ornaments adorable? These showed up in my mail a few weeks ago after I won a giveaway. Dana's work is exquisite. I am thrilled to add these little beauties to my ornament collection.
Unfortunately, this year most of my ornaments remain stuck in their storage bins because our tree looks like this:
 Pathetic, isn't it? This is our sure sign that there is a 2-year-old in residence. Even with the lower half of the tree bare, he still figures out how to cause havoc. Did you know that even soft ornaments heaved into the upper branches will dislodge other ornaments? Now I do. All movable objects that could boost said 2-year-old more than an inch off the ground will now need to be bolted to the floor.
Now, here's a few sneak peeks of some projects I'll be sharing in the coming days:


Unfortunately, this year most of my ornaments remain stuck in their storage bins because our tree looks like this:

Now, here's a few sneak peeks of some projects I'll be sharing in the coming days:


Subscribe to:
Posts (Atom)